A gas strut can look fully fitted while its socket is only sitting on the edge of the ball stud. That is why it pays to install gas strut safety clips correctly. The small retaining clip is what keeps the socket positively engaged on the ball stud when a tailgate, canopy door, toolbox lid or machinery guard is opened and closed repeatedly.
The job is usually quick, but it should never be rushed. A loose socket can detach without warning, leaving a heavy lid, hatch or panel unsupported. Before touching the clips, make the load safe and confirm that the strut, end fitting and ball stud are matched for the application.
What gas strut safety clips do
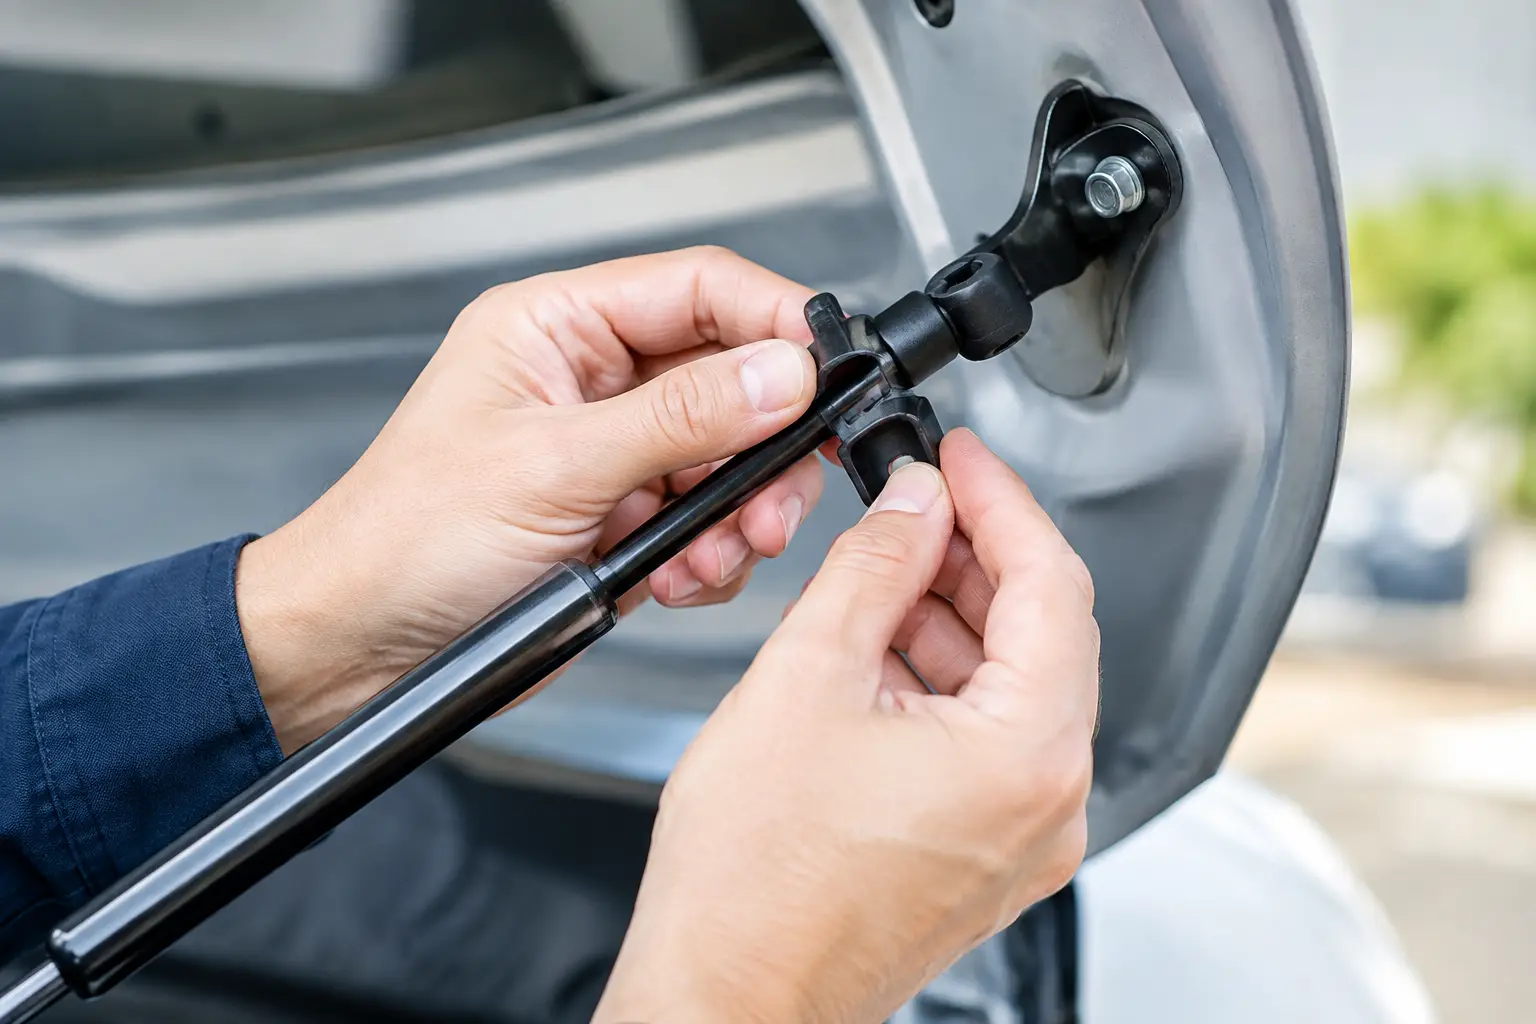
Most gas struts use a ball-and-socket connection at each end. The socket pushes over a ball stud, while a spring-steel safety clip sits in a groove around the socket opening. Once the socket is fully fitted, the clip grips behind the neck of the ball stud and helps stop the fitting from pulling off.
These clips are retainers, not load supports. They do not compensate for worn ball studs, cracked sockets, incorrect mounting brackets or a strut with the wrong force rating. If a boot, bonnet, caravan hatch or industrial lid will not stay up, fitting a clip alone will not solve the underlying issue.
There are variations in clip shape between end fittings. Some are a curved wire clip partially visible around the socket. Others are flat metal retaining clips. The fitting method is similar, but the correct replacement clip must suit the socket and ball stud size. Do not assume every clip fits every strut end.
Before you install gas strut safety clips
Support the lid, hatch or panel independently before disconnecting or fitting a strut. Use a properly rated prop, a second person where practical, or suitable workshop equipment. Never rely on the remaining strut to hold a heavy panel, particularly on a 4WD canopy, trailer lid, machinery cover or marine hatch.
Inspect the mounting hardware while the strut is accessible. The ball stud should be clean, round and firmly mounted. A badly corroded, flattened or loose ball stud can damage the socket and may allow the fitting to come free even with its clip installed.
Check the strut ends as well. If the socket is split, excessively loose, rusted through or missing part of its retaining groove, replace the end fitting or the complete strut as appropriate. Avoid trying to reshape a fatigued clip or forcing an unsuitable one into place. It may appear secure until vibration and working load expose the problem.
For replacement struts, also confirm the extended length, compressed length, stroke, end fitting type and Newton force rating before installation. A safety clip secures the connection, but the strut must still be specified for the weight, mounting geometry and operating environment.
Fitting the clip and socket to the ball stud
1. Set the safety clip in its ready position
On most sockets, the clip stays partly installed in the groove around the socket opening. It may need to be lifted out slightly to allow the ball stud to enter. Use a small flat screwdriver only if necessary, and lift the clip gently from its centre tab or exposed edge.
Do not remove the clip completely unless the fitting design specifically requires it. Small clips are easy to lose, and forcing them back into a loaded socket can distort the retaining section. The correct ready position leaves the socket opening clear enough to push onto the ball while keeping the clip captured in its groove.
2. Align the socket squarely
Position the gas strut so the socket meets the ball stud straight on. Do not approach the ball at a severe angle or use the strut body as a lever. Misalignment can spread the socket opening, damage the seal around the fitting or bend the mounting bracket.
If the mounting point is difficult to reach, adjust the supported lid or panel slightly rather than pulling the strut into place under tension. A strut should connect without excessive force when the mounting positions and dimensions are correct.
3. Push the socket fully onto the ball
Press the socket firmly over the centre of the ball stud until it seats. You may hear or feel a distinct click as the clip moves over the ball and settles behind the ball neck. On some fittings, the click is subtle, so do not treat sound alone as confirmation.
The socket should sit evenly around the ball with no obvious gap. If it will not seat, stop and inspect the clip position, ball size and socket type. Do not strike the fitting with a hammer. Impact can damage the socket, ball stud, bracket or internal gas strut components.
4. Check that the clip has locked
Look around the socket opening. The clip should be seated evenly in its groove and located behind the narrower section of the ball stud. If part of the clip is lifted, twisted or sitting outside the groove, the connection is not complete.
Give the strut a controlled, light pull directly away from the ball stud while the lid remains safely supported. The socket should not move off the stud. This is a seating check, not a test of the strut’s lifting force, so do not hang weight from it or operate the panel before confirming both ends are secure.
Repeat the process at the other end of the strut. A new strut may have clips already fitted to its sockets, while replacement end fittings may be supplied separately. Either way, inspect both connections before removing the prop.
Common installation mistakes
The most common mistake is fitting the socket over the ball with the safety clip fully removed or stuck in the open position. The socket may hold briefly, but it can release as the panel moves through its travel or when the vehicle hits rough roads.
Another issue is using pliers to squeeze the clip hard into place. This can flatten the spring steel and reduce its holding ability. If a clip will not seat with firm finger pressure or gentle screwdriver guidance, check whether it is the correct clip for that socket.
Do not install a clip over a damaged ball stud and assume the issue is fixed. A ball stud with heavy corrosion, a worn neck or loose threads should be replaced. The same applies to mounting brackets that flex or have enlarged holes. On high-use applications, small amounts of movement become larger failures quickly.
It is also worth checking strut orientation. In many standard installations, the rod should point down when the lid is closed. This helps keep the internal seal lubricated and supports service life. Some applications require a different orientation due to space, travel or engineering requirements, so follow the original mounting arrangement where possible.
Removing a gas strut safely
To remove a strut, support the load first. Then use a small flat screwdriver to lift the outer edge of the safety clip just enough to release its grip on the ball stud. You generally do not need to remove the clip entirely.
Once the clip is lifted, pull the socket straight off the ball stud. Keep fingers clear of pinch points, especially around hinges and closing panels. Repeat at the other end only after the panel is independently supported.
Never drill, heat, cut or puncture a gas strut. It is pressurised and should be replaced as a sealed component when damaged or worn. If the strut is difficult to remove because the socket has corroded onto the ball, deal with the corrosion carefully rather than applying force to the strut tube.
When a clip needs replacement
Replace a safety clip if it is missing, bent, cracked, heavily corroded or no longer sits firmly in the socket groove. In fleet, agricultural, mining and marine environments, regular inspection is sensible because dust, salt, vibration and repeated cycles can affect end fittings before the strut itself appears to fail.
For a correct replacement, identify the socket style and ball stud diameter. Common ball sizes are not automatically interchangeable, and a clip that looks close can still fail to lock correctly. Providing the strut length, Newton rating, end fitting details and a clear photo of the mounting point will help a strut specialist identify the right component.
A properly fitted safety clip is a small detail with a large job. Take the extra minute to check both ends before putting the panel back into service, particularly where people work beneath a raised lid or hatch.